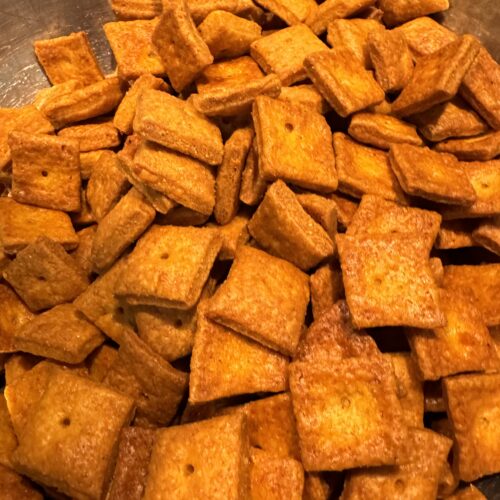
Cheese Crackers Made with Fresh Milled Flour
These cheesy, salty crackers made with fresh milled flour are full of fiber, healthy fats and lack additives the store bought crackers need to maintain their freshness on the shelf for months or even years.
Equipment
- 1 Cheese grater If you don't have a food processor with a grater attachment
- 1 Chopstick
Ingredients
- 16 oz sharp cheddar cheese block, not pre-shredded
- 4 oz butter 1 stick
- 120 grams spelt
- 120 grams soft white wheat
- 4 Tbsp water
- 1 tsp onion powder
- 2 tsp granulated garlic NOT garlic powder
- 1 Tbsp tomato paste
- 2 tsp Redmond's Real Salt plus additional for sprinkling after cutting
Instructions
- Mill your grains on the finest setting on your mill
- Next, grate your cheddar cheese and butter. I like to use my food processor with the grater attachement for this, but you can use a hand grater.
- In a stand mixer fitted with a paddle on a Kitchen Aid style mixer or Roller on your Ankarsrum mixer, add your butter and cheese. Start to soften these on the lowest setting just until they begin to combine.
- Next, add your flour, salt, garlic and onion powder to the bowl slowly so you do not fling any dough out of the mixer. As this mixes, pour in the water and tomato paste. Mix until you have a smooth, consistent dough.
- Divide the dough into 4 equal sections. Scoop the dough sections out onto plastic wrap and wrap each into a ball. Flatten the balls of dough into disks a couple of inches thick. Place them in the refrigerator for atleast 1 hour or until you are ready to roll out and bake.
- Preheat oven to 350 ℉
- Pull disks of dough from the refrigerator when you are ready to bake and allow to warm up until they are soft enough that you can roll them out. If I had it in the fridge for just an hour, I can usually roll out right away. However, if I left in longer, I will have to let it warm up slightly before rolling out.
- On a silicone mat, roll out your dough as thin as you can get it. I try to get mine to 1/8". The thinner you can get your dough, the crispier and better they will be. If you do not have a silicone mat, roll your dough between two pieces of parchment paper.
- Using a pizza cutter, cut your crackers into 1"x1" squares. I have a 5-wheel pizza cutter that saves a lot of time if you make these often, they are about same price as a single pizza cutter! After cutting your squares, remove excess dough that does not make up a full square around the edges. Sprinkle your dough with more salt. Just a light dusting. This gives it the course, salty texture of commercially produced cheese crackers! Using a chopstick, poke a hole in the center of each cracker.
- Transfer your crackers to a parchment lined sheet pan, making sure the crackers do not touch. They will shrink some when they bake.Because every oven is so different, it is going to be crucial you watch your crackers closely until after you bake them and can find the perfect time for your specific oven.
- I bake on the convection bake setting for 16 minutes and rotate halfway through baking. Your crackers should be a dark golden brown around the edges when they are done. I do think they need to bake longer than I initially expected. In fact, I lost track of time and thought I burned them, and was shocked how delicious they were. The real test is when the crackers cool, they should have a good crunch and not be soft. I have found them to retain their flavor and texture longer when I bake them longer and make them a little more crispy.
Nutrition
Serving: 1ozCalories: 163kcalCarbohydrates: 9gProtein: 7gFat: 11.6gFiber: 1.5gSugar: 0.12g
Tried this recipe?Let us know how it was!