
This Honey Oat Wheat Bread is my staple, weekly bread! I is delicious as a loaf or as a dinner roll. Either way, it never lasts more than 3-4 days in our house. Making this bread with Fresh Milled Hard Red and Hard White wheat makes this a nutrient dense sandwich bread, breakfast toast and after school snack.
There are a couple different variations to this Honey Oat Wheat Bread recipe. As a split-top loaf it makes an incredible loaf of sliced sandwich bread. Leaving the top solid, creates a delicious, fluffy steak house style bread. The dinner rolls are amazing by themselves or as a slider bun or baked ham and cheese. This bread is so versatile, I can use it in so many ways, my family never gets tired of it!
If you’re new to fresh milled flour or unsure what this is, here is some more information to help you get started!
This post may contain affiliate links, please see our privacy policy for details.
Table of Contents
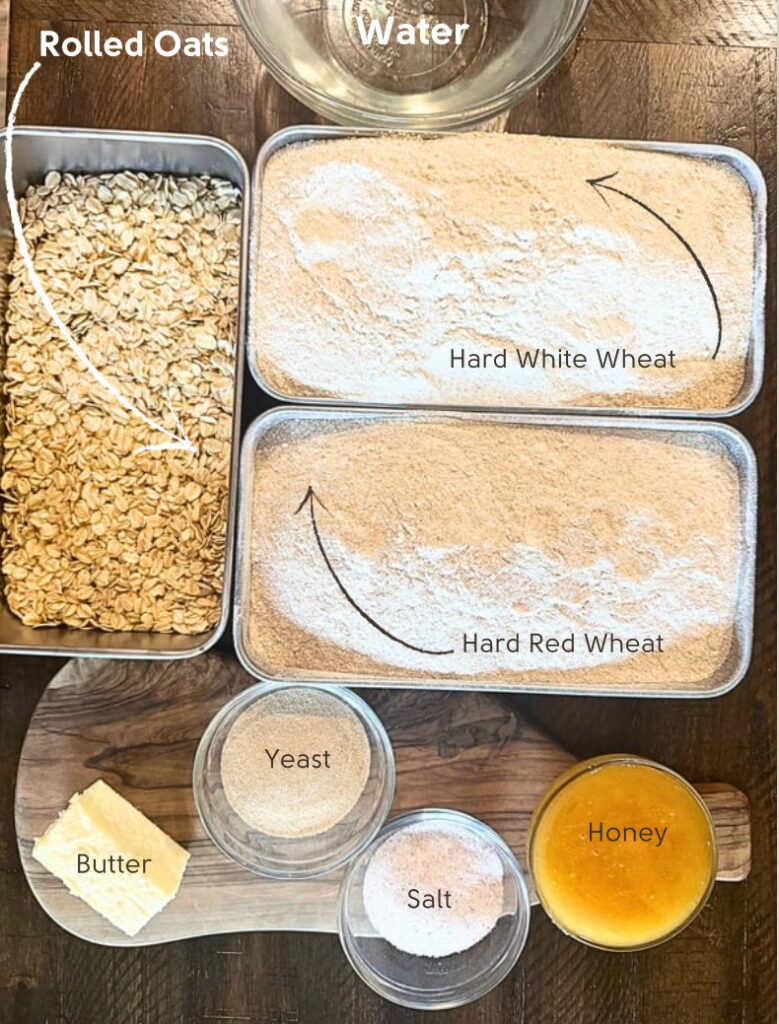
Ingredients Needed
- Hard Red Wheat Berries
- Hard White Wheat Berries
- Warm Water
- Honey
- Butter
- Salt
- Yeast-Instant
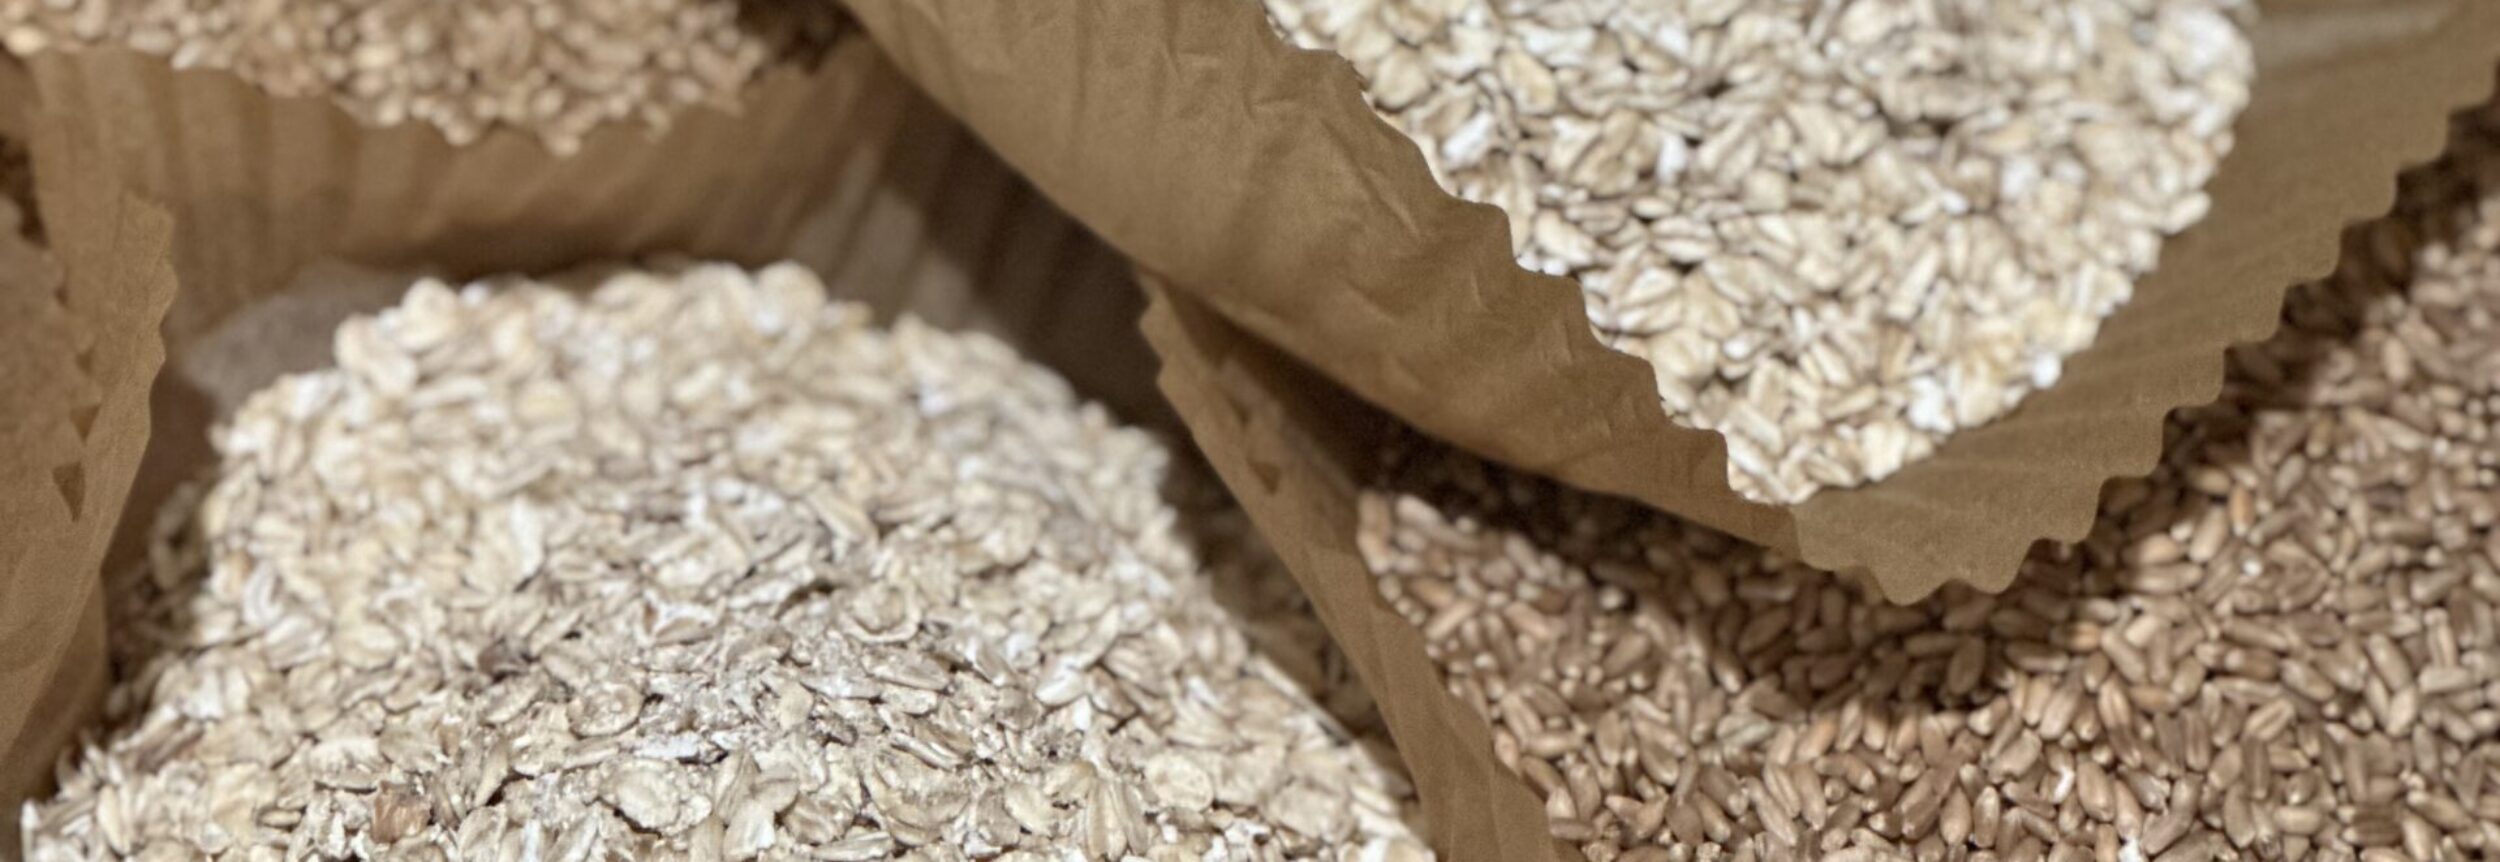
- Oats
- Egg Yolks
- Additional Egg and Oats for egg wash and topping the bread
Equipment Needed
- Grain Mill
- Stand Mixer
- Digital Scale
- Measuring spoons
- Liquid measuring cups
- 2 Loaf Pans or a sheet pan if making dinner rolls
- Parchment Paper
- Probe thermometer
All equipment used in this recipe can be found here!
How to make Honey Oat Wheat Bread
Start by milling your wheat berries into flour and add to a stand mixer. Add your whole rolled oats and salt to the flour.
Weigh out your liquid ingredients; warm water, honey and room-temperature butter. Place the liquids in the microwave or on the stove just until the butter is melted. Pour liquids into the stand mixer. Turn the mixer on low for a minute or until all flour is moistened. Cover and allow the mixture to autolyse for at least 20-30 minutes.
MIXER NOTES: I have the Ankarsrum mixer. If I am making 2 loaves, I like to use the roller attachment. If I am making 4 loaves, I will use the hook attachment.
After the autolyse period, add the egg yolk and instant yeast to your dough. If you only have dry active yeast, reserve some of your water to activate prior to adding to the recipe. Mix on 2nd speed for 15-20 minutes or until you reach Windowpane consistency. Kara, from Grains in Small Places explains this technique best and is who I learned from!
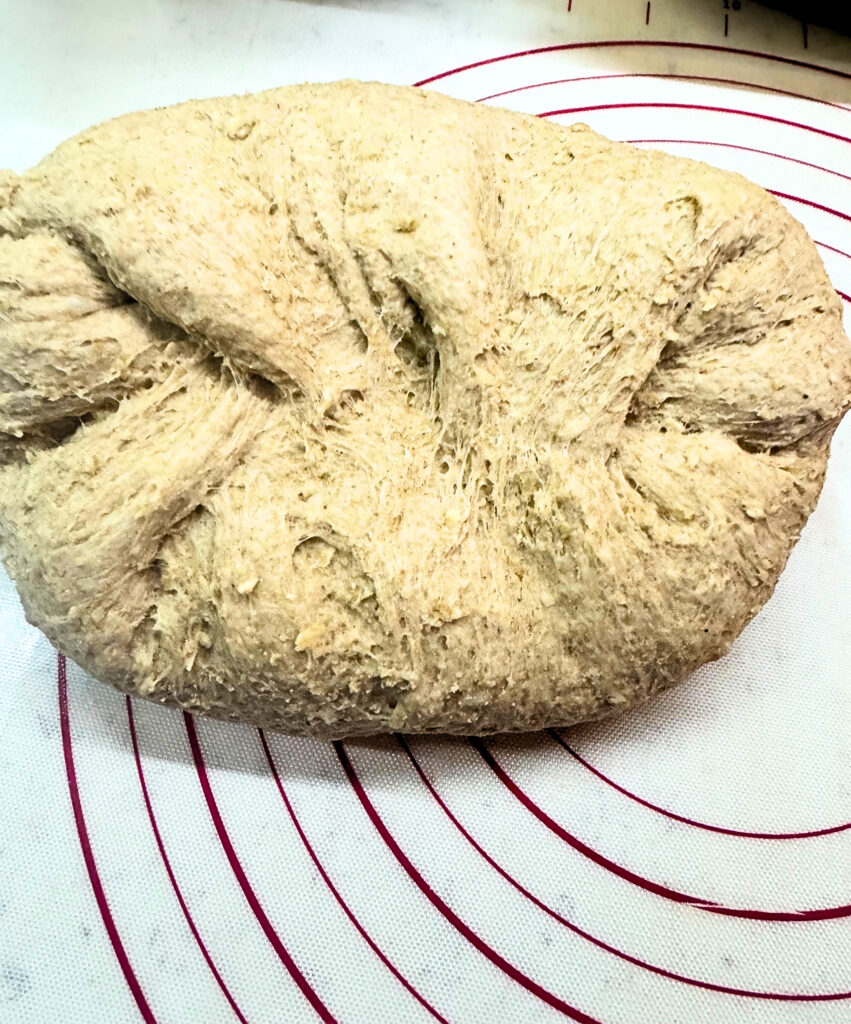
Cover dough and let rise until doubled in size, approximately 1 hour.
Portioning out dough
Each loaf usually weigh about 1080g. Weigh your dough and divide in half to determine each loaf’s weight. If you are wanting to make 2 dozen dinner rolls, they usually weigh 90g each. Again weigh your dough and divide by 24 prior to portioning.
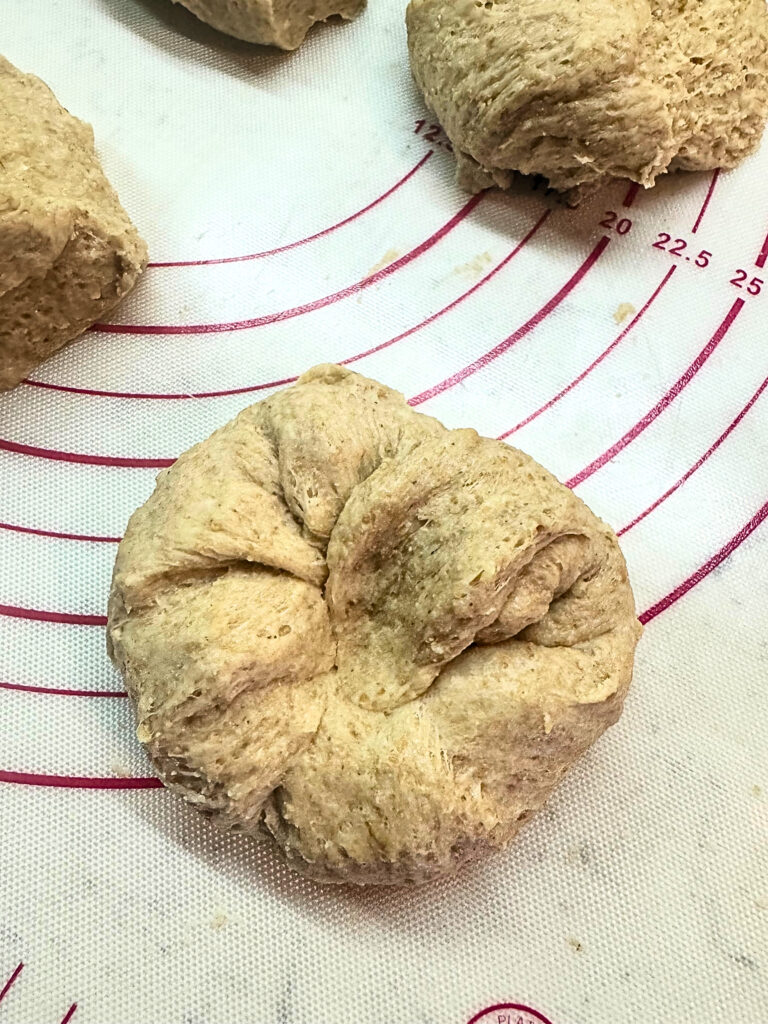
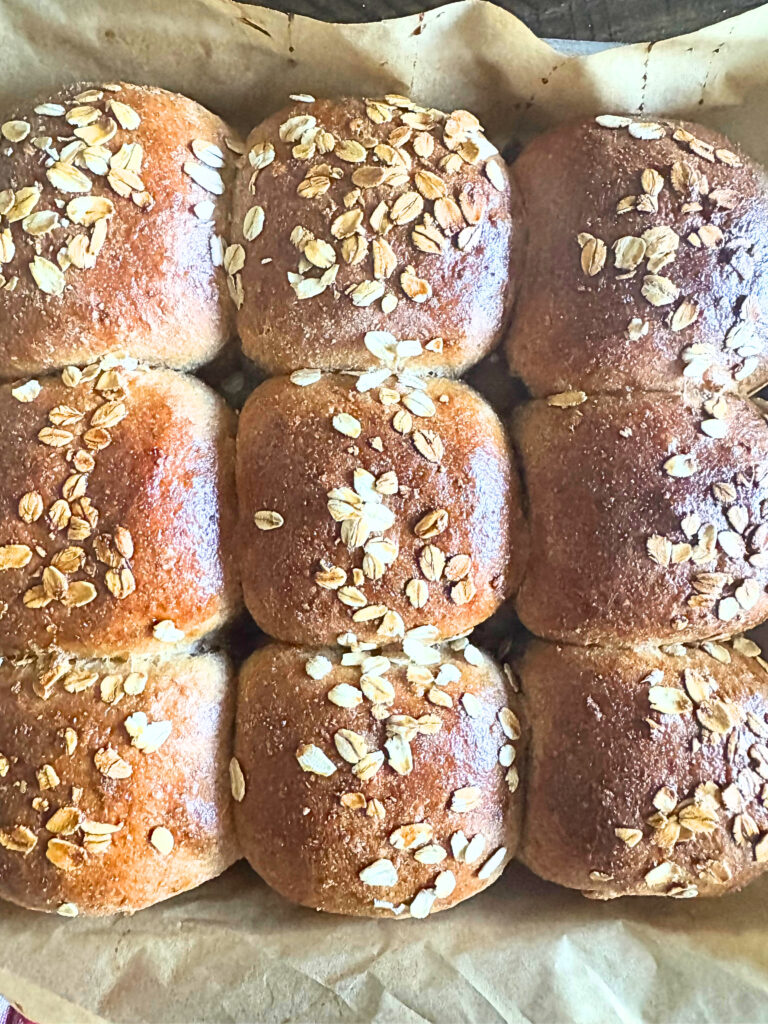
This image is of the dinner rolls. Grab small sections of dough and stretch up and towards the center and work in a circle around the edge repeating this process. Once you have made my way all the way around, flip them over and roll in a circular motion to smooth out the top and create as much surface tension as possible.
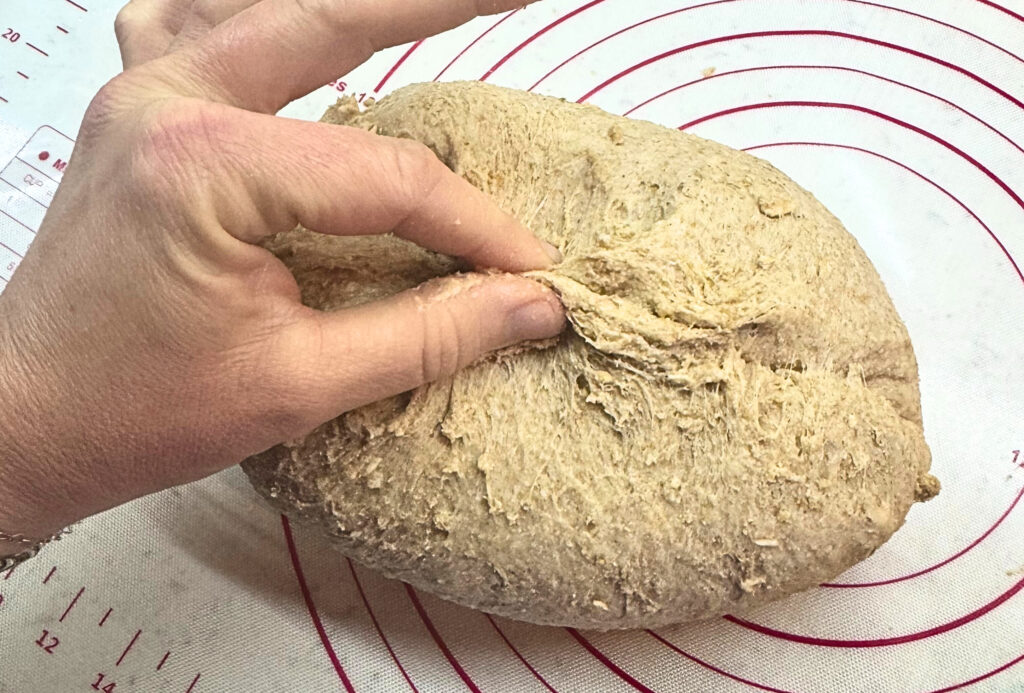
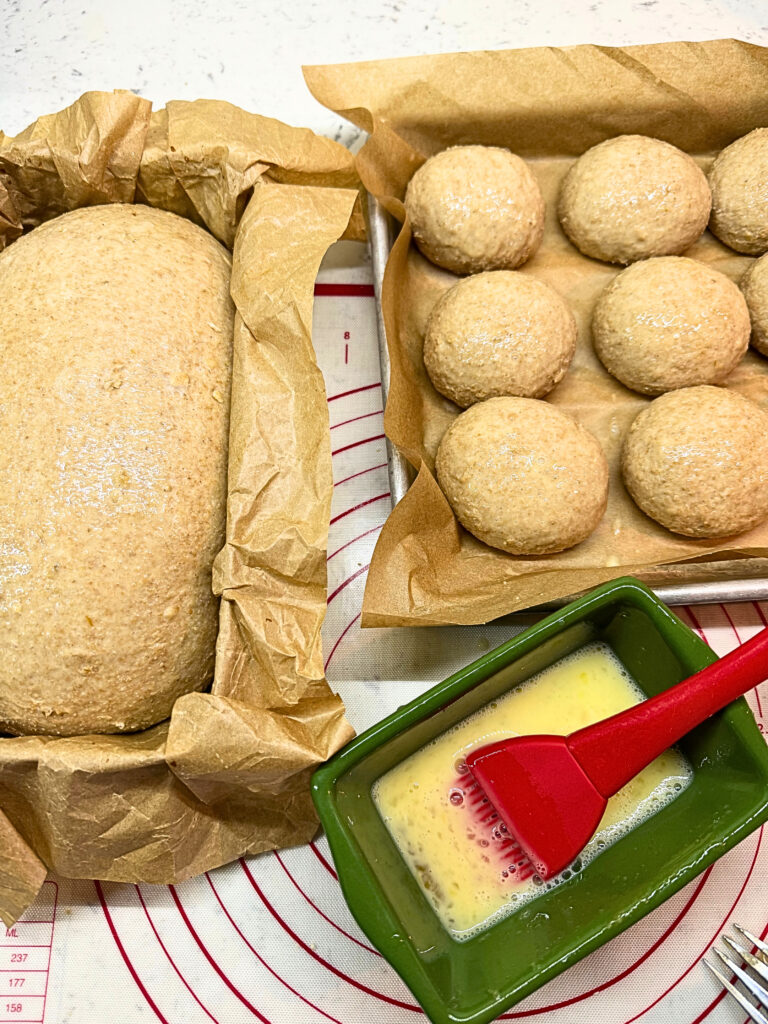
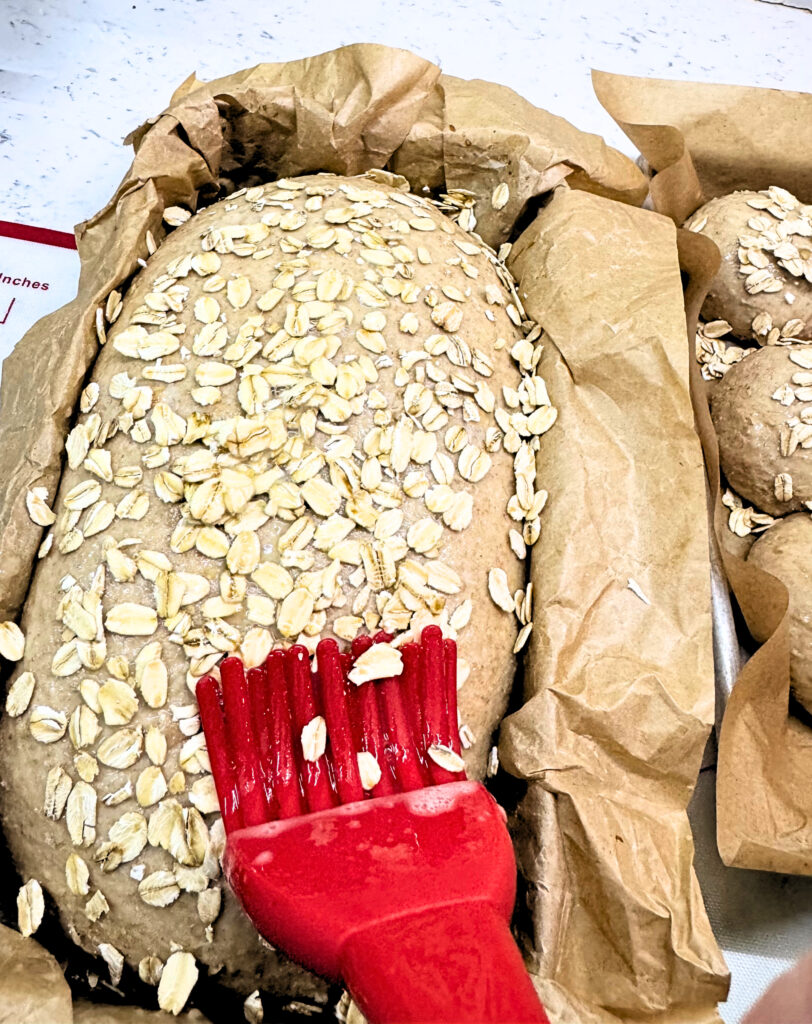
When shaping loaves, stretch and fold the dough back over itself to create tension in the dough. Once you have achieved good tension in the dough and have a smooth top-side, pinch the bottom of the dough together. Flip over and place into a parchment lined loaf pan or on a lined sheet pan. Cover with a tea towel and allow to proof 10-15 minutes more. Once proofed, brush the top with an egg wash, sprinkle oats on top and brush with the egg wash again. This helps the oats to stick but also prevent them from burning.
There are a couple of different techniques I have discovered on my loaves, depending on what I would like to use the bread for. If you want a “steak house” loaf of bread, light and fluffy for smearing butter on, I bake as is. However, if I want to have a loaf for sandwiches and a slightly tighter crumb, I will take a knife or Lame and make a shallow slit end to end!
Baking the bread
Preheat your oven to 350 degrees F when you put your dough in the prepared pans for the final proof. Make sure your rack is in the middle of the oven, this bread does rise quite a bit during baking.
Loaves: Bake for 25 minutes, rotate your loaves and bake for 25-30 more minutes. Take a probe thermometer and stick it in the end of your loaf. You will want to bake your bread to an internal temperature of 190 degrees.
Dinner Rolls: Place rolls in the preheated 350 degree oven for 15 minutes, rotate and bake 10-15 more minutes. Again, you want to check that the internal temperature of your bread is 190 degrees F.
Remove from oven and pan, place on cooling rack until completely cooled.
The Honey Oat Wheat Bread dinner rolls can cool on the pan since they are not as large and dense as a loaf.
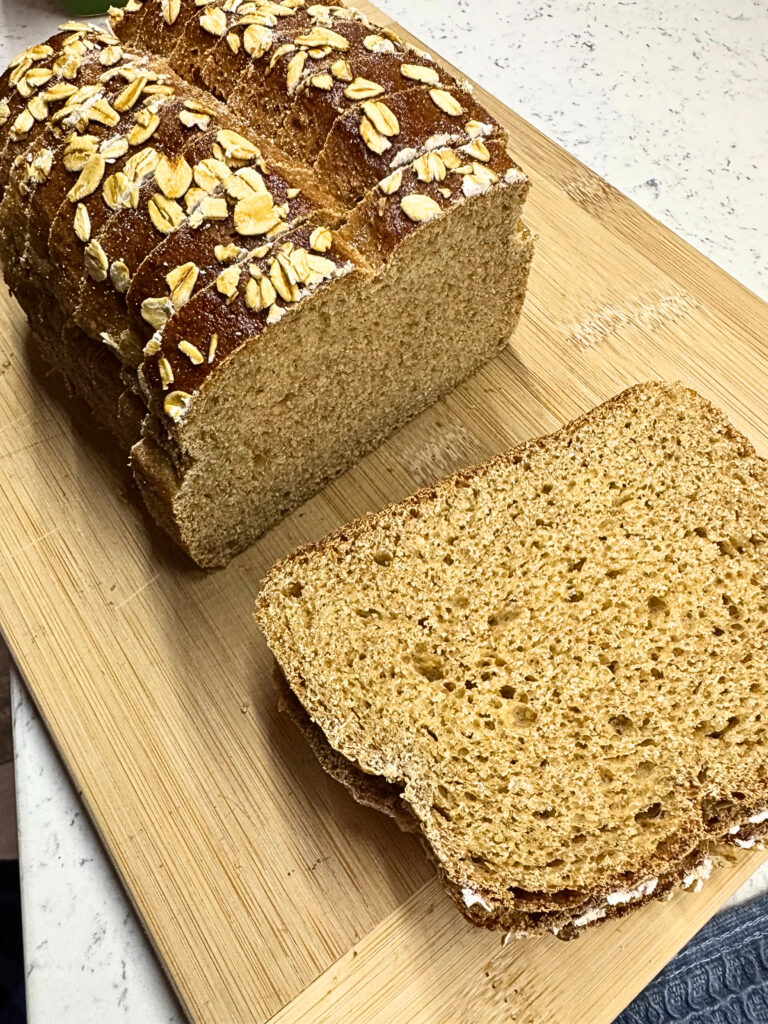
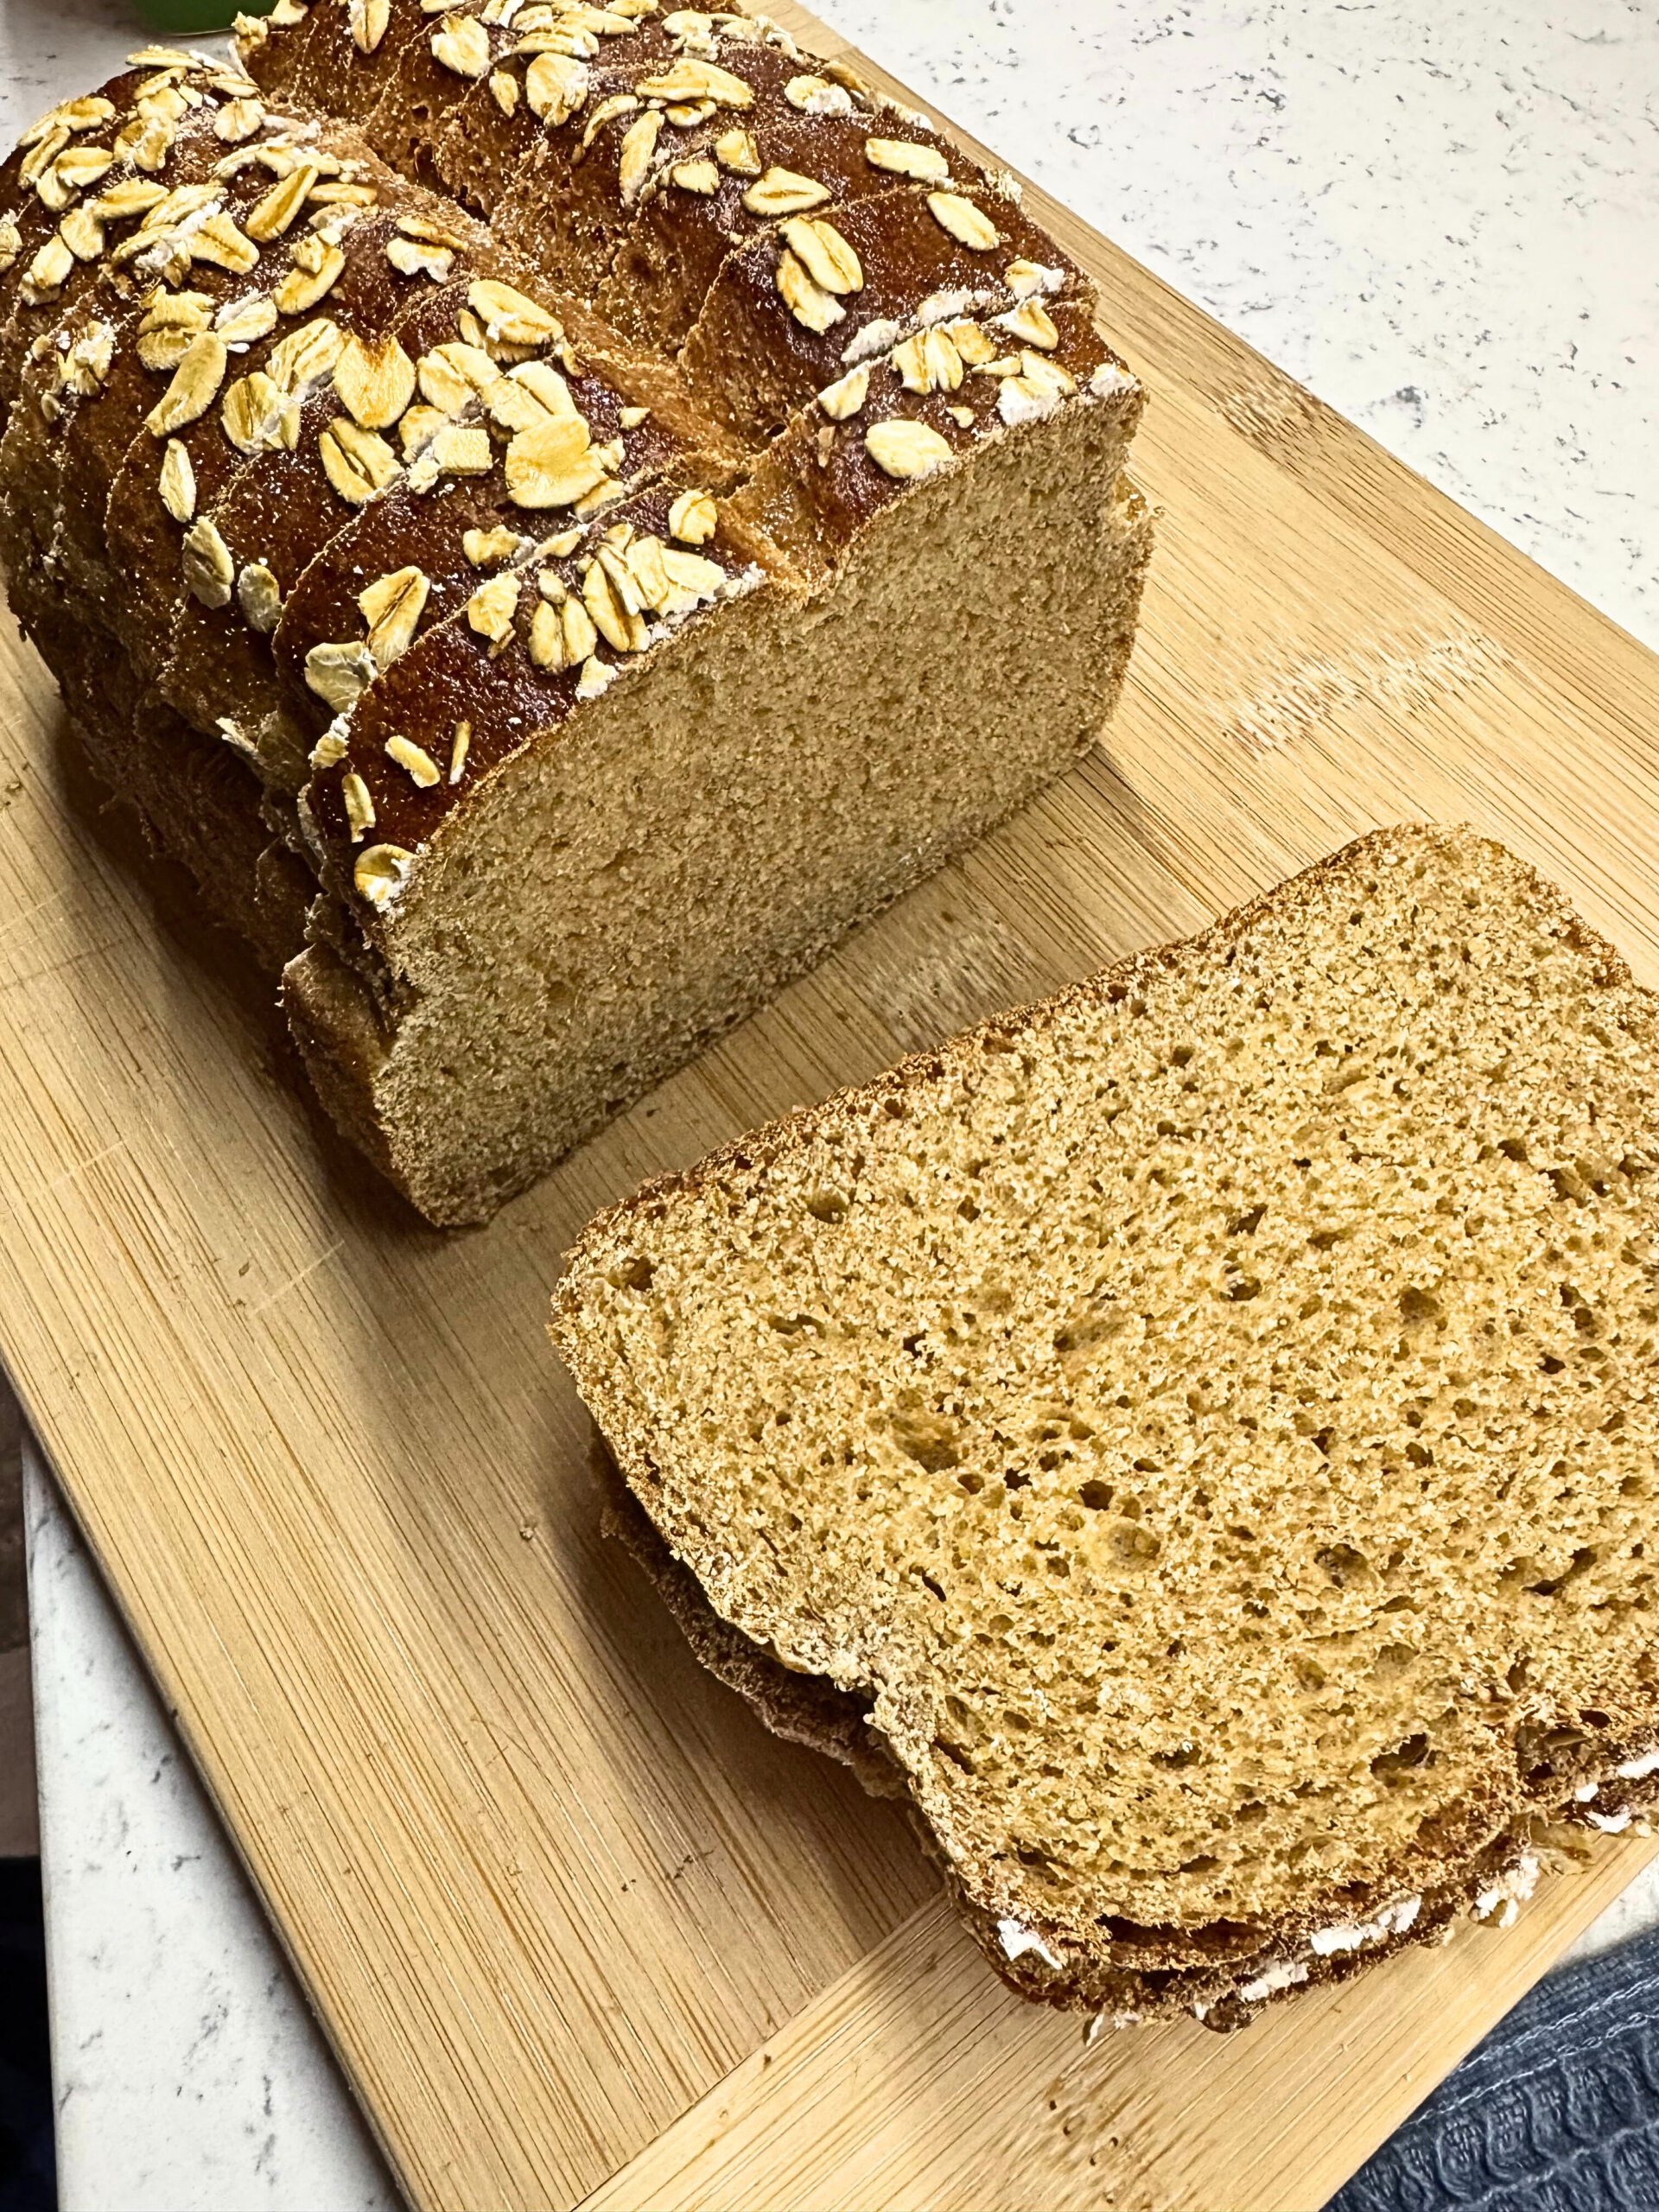
This is my split-top wheat loaf. It provides a great crumb and I am able to slice it thin for sandwiches!
THANK YOU!
Honey Oat Wheat Bread
Equipment
- 2 Loaf Pans If making loaves
- 1 sheet pans If making dinner rolls
- 1 Small Bowl
Ingredients
- 480 grams Hard White Wheat
- 480 grams Hard Red Wheat
- 750 grams Warm water
- 170 grams Honey
- 56 grams butter unsalted, room temperature
- 1 Tbps Redmonds Real Salt
- 4 tsp Yeast instant
- 162 grams Rolled Oats
- 2 egg yolks
Topping
- 1 egg
- 1 Tbsp water
- 1/2 cup oats
Instructions
- Start by milling your wheat berries into flour and add to a stand mixer. Add your whole rolled oats and salt to the flour.
- Weigh out liquid ingredients; warm water, honey and room-temperature butter. Place the liquids in the microwave or on the stove just until the butter is melted. Pour liquids into the stand mixer. Turn the mixer on low for a minute or until all flour is moistened. Cover and allow the mixture to autolyse for at least 20-30 minutes.
- MIXER NOTES: I have the Ankarsrum mixer. If I am making 2 loaves, I like to use the roller attachment. If I am making 4 loaves, I will use the hook attachment.
- After the autolyse period, add the egg yolk and instant yeast to your dough. If you only have dry active yeast, reserve some of your water to activate prior to adding to the recipe. Mix on 2nd speed for 15-20 minutes or until you reach Windowpane consistency.
- Cover dough and let rise until doubled in size, approximately 1 hour.
Portioning Dough and Preparing Bread
- Each loaf usually weigh about 1080g. Weigh your dough and divide in half to determine each loaf's weight. If you are wanting to make 2 dozen dinner rolls, they usually weigh 90g each. Again weigh your dough and divide by 24 prior to portioning.
- Shaping Rolls:Grab small sections of dough and stretch up and towards the center and work in a circle around the edge repeating this process. Once you have made your way all the way around, flip them over and roll in a circular motion to smooth out the top and create as much surface tension as possible. Place the rolls onto the parchment lined sheet pan, with about a finger's width space between each.
- Shaping Loaves:Stretch and fold the dough back over itself to create tension in the dough. Once you have achieved good tension in the dough and have a smooth top-side, pinch the bottom of the dough together. Flip over and place into a parchment lined loaf pan.
- Preheat oven to 350℉
Second Proof
- Cover with a tea towel and allow to proof 10-15 minutes more.
Make Egg Wash
- Add egg and 1 Tbsp of water to a bowl. Whisk until combined.
Bake Bread
- Once proofed, brush the top with an egg wash, sprinkle oats on top and brush with the egg wash again. This helps the oats to stick but also prevent them from burning.
- There are a couple of different techniques I have discovered on my loaves, depending on what I would like to use the bread for. If you want a "steak house"loaf of bread, light and fluffy for smearing butter on, I bake as is. However, if I want to have a loaf for sandwiches and a slightly tighter crumb, I will take a knife or Lame and make a shallow slit end to end after I put the oat topping on.
- Make sure your rack is in the middle of the oven, this bread does rise quite a bit during baking. Loaves: Bake 25 minutes, rotate your loaves and bake for 25-30 more minutes. Take a probe thermometer and insert it in the end of your loaf. You will want to bake your bread to an internal temperature of 190 ℉. Dinner Rolls: Bake 15 minutes, rotate and bake 10-15 more minutes. Again, you want to check that the internal temperature ofyour bread is 190 ℉.
- Remove from oven and pan, place on cooling rack until completely cooled. The dinner rolls can cool on the pan since they are not as large and dense as a loaf.
Nutrition
Storing Bread
This bread has no preservatives, therefore it will spoil fairly quickly if not handled with care. Always be sure and wash hands and knives well before handling. Store in a paper/plastic bread back on the counter for 2-3 days. Any longer, I actually freeze my bread and pull the night before to thaw. The refrigerator is an option, although I do find that it dries it out if I do not plan to toast the bread.
FAQ for Honey Oat Wheat Bread
What is the difference in texture between the split top loaf of bread and the regular?
Both have a great texture. The loaf, un-split, is VERY light and fluffy. It can be sliced for a sandwich, although it is difficult to slice very thin without it tearing. You will not be able to smear a thick peanut butter on it without tearing it apart. We love this bread, sliced thick, with butter and honey for an after school snack or breakfast! When the the top is scored, it allows some of the steam to release while baking and therefore creates a tighter crumb. This loaf can be sliced very thin and makes a wonderful sandwich bread.
Can I freeze the bread?
Yes! I actually prefer to store the bread in the freezer if I am not going to eat it within 3 days!
How do I know my bread is proofed enough?
This dough does have 2 different proofing periods. The first proof, you do want to make sure your dough doubles. Place in a clear container, mark the side and monitor it closely. Depending on your kitchen temperature, this could take more or less time than the specified hour.
Once you have placed the prepared dough into the pans, you DO NOT want to over proof at the step. Usually my dough in the loaf pan will fill out slightly, almost reaching the end of the pan. The dough will be close to the top of the pan or slightly over. If you wait until the dough completely fills in the end of the pan, they will be over proofed. Always err on the side of caution and bake sooner rather than later. If your bread is over proofed, it will spill over the side of the pans and lose all steam, creating a gummy center!
THANK YOU!
Thank you so much for trying this recipe, I hope you love this Honey Oat Wheat Bread as much as my family does. If you make this recipe, please share and tag me on Instagram or Facebook! And, please leave a comment or star rating below. I love to see everyone be successful in the journey to a healthier lifestyle with fresh milled flour! Don’t hesitate to contact me with any question, chances are we will both learn something from us working through it together!
Happy Baking!
Bailey Basics is a participant in the Amazon Services LLC Associates Program, an affiliate advertising program designed to provide a means for sites to earn advertising fees by advertising and linking to amazon.com. I may earn a commission, with no additional cost to you, if you purchase through those links.
Bailey Basics is not a dietitian or nutritionist, and any nutritional information shared is an estimate. If calorie count and other nutritional values are important to you, we recommend running the ingredients through whichever online nutritional calculator you prefer. Calories can vary quite a bit.